Tue May 13, 2008 7:58 am

Here is a wiring diagram for hooking up a float switch.

Image

I mounted mine like that also, this keeps the manifold under the water.

Image
User avatar
Monster Mash
 
Posts: 140
Joined: Mon Jun 06, 2005 8:49 am

Mon Jun 02, 2008 5:08 pm

Sorry I've been MIA to answer, but my efficiency is at 82-83% when I sparge over an hour for a 12 gallon batch.

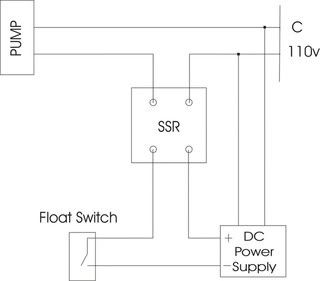
That is the correct float switch diagram to follow. But I was having a few issues with that style float system and sparging. I didn't like that the float controlled the pump between the HLT and MT. With all the on-off-on-off... I couldn't regulate the temperature of sparge water into the MT very well. Too much heat was being lost in the lines when the pump was off, followed by a spike in high temperature water once the pump was on.

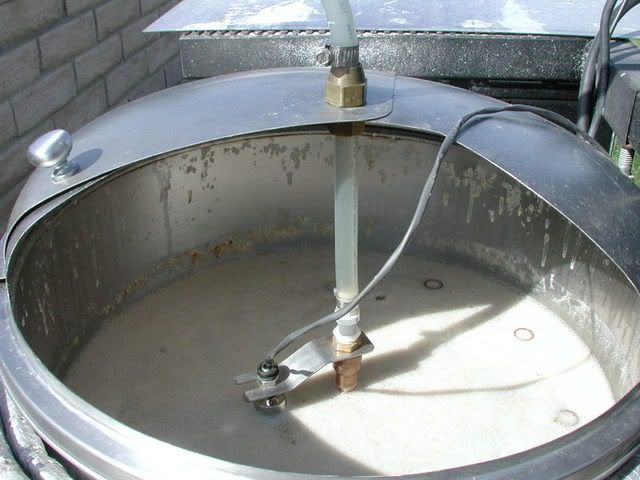
I changed my system to do this. I inverted the float in the MT. I changed the wiring to activate the other pump, between the MT and BK. Now I just turn on the pump between the HLT and MT at a very slow, but CONSTANT SPARGE RATE. When the liquid level raises the float, the switch turns on the "Drain pump to the BK". This way I can throw in my temperature probe into the very top of my MT and let the LOVE controllers control the temperature of the HLT to 170 degrees. Pretty sweet setup. I don't know if anyone else is doing this, but I'll post some pictures of it. It's nice!

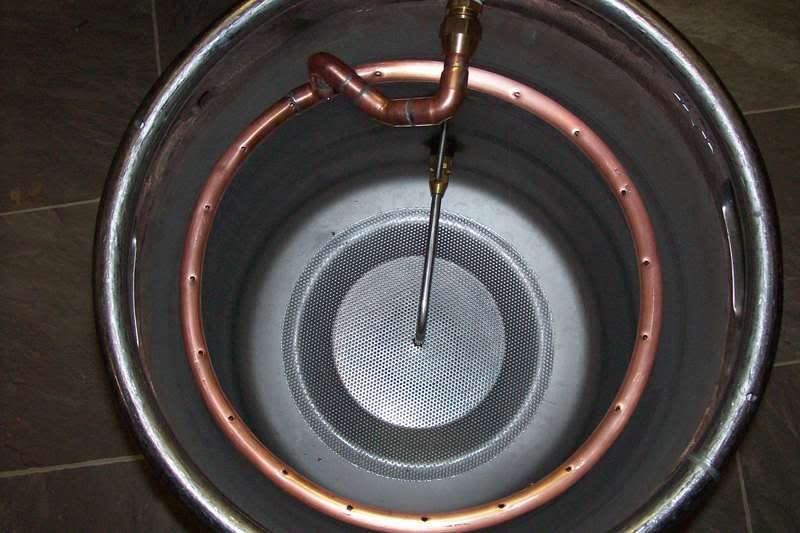
Here is the sparge ring with inverted switch now:
Image

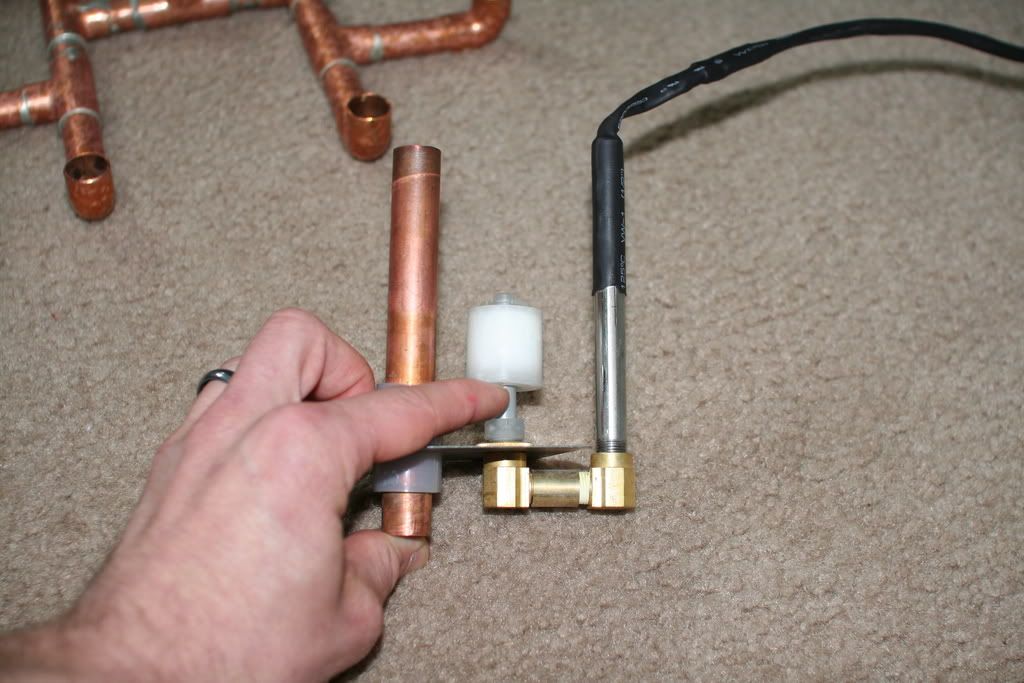
Below - "Drain turns On Position": The float rises with the liquid level in the MT and once it reaches the top, it turns on the drain
Image

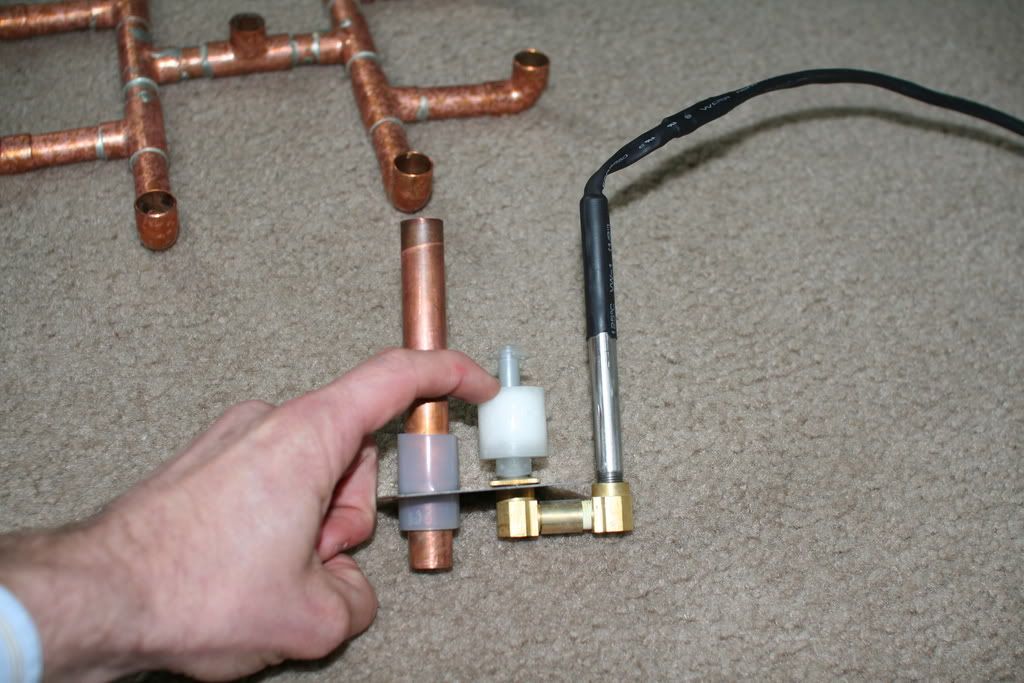
Below - "drain in the off position"
Image

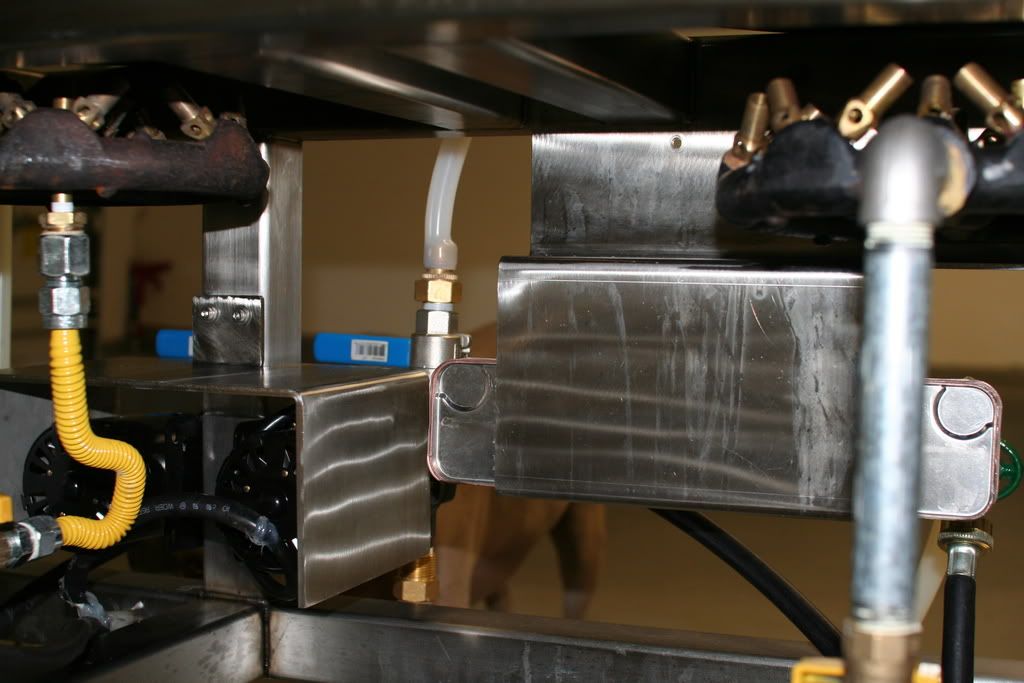
another pic. this is the back side of my heat shield. It also allows for quick attachment or removal of the plate chiller which I LOVE! The chiller just slides perfectly in the groove.
Image
Terrazza
 
Posts: 48
Joined: Tue Dec 27, 2005 5:48 pm

Tue Jun 03, 2008 1:11 pm

So that "sparge ring" just sits on top of the grain bed?


Tim
Think Oregon, Drink Oregon
:aaron
Support Your Local Brewer
User avatar
TiMX
 
Posts: 84
Joined: Mon Jun 26, 2006 6:48 am
Location: Pendleton, Oregon

Sun Jun 08, 2008 7:27 am

TimX,
Yeah, it just sists on top of the grain bed. It is supported above from the silicone hose that is fed through an aluminum cooking lid. But even so, it seams to sit lop-sided. It's something I'm going to fix. I love the inverted float switch though. Another problem I have with this manifold is that it clogs with grain.

I also am oging to get rid of my hop hanger and just use a stainless false bottom in my BK. I notice when I recirculate my boiling wort through the plate chiller to sanitize it and redirect its entry into the hop hanger that it puffs up like a big balloon. Makes me wonder how much boiling wort is coming in contact with the hops in their or if it is just acting like 2 separate compartments. :?
Terrazza
 
Posts: 48
Joined: Tue Dec 27, 2005 5:48 pm

Sun Jun 08, 2008 10:10 am

Terrazza wrote:Another problem I have with this manifold is that it clogs with grain.


Are you talking about your manifold on the bottom, or the recirc one up top? What kind of bottom/manifold do you have? I can't imagine that the top manifold is clogging... I was just about to make one like that for myself.... please advise.


Mylo
"Life is too short to bottle homebrew." - Me

"HEINEKEN? Fuck that shit! Pabst Blue Ribbon!!!" - Dennis Hopper, in Blue Velvet
User avatar
Mylo
Global Moderator
 
Posts: 4722
Joined: Tue Oct 09, 2007 10:50 pm
Location: Scottsdale, AZ

Sun Jun 08, 2008 7:56 pm

I have a stainless false bottom. I'm talking about the sparging manifold on top of the grain bed. The reason it clogs is because I have it placed in the MT before I begin sparging. Floating grain deposits inside the holes, and when I begin sparging, it is clogged... Easy to fix, I just blast sparge water through it with the pump throttle wide open, and then ease it back to my sparge rate. Although sometimes, blasting sparge water through that just finds the path of least resistance and blows out only one or two of the holes. Maybe it'd be better to just keep it out of the MT until you begin sparging, and turn on the pump as you are placnig it in. That's that's just something to make better... I'm just picky I guess. :)
Terrazza
 
Posts: 48
Joined: Tue Dec 27, 2005 5:48 pm

Mon Jun 09, 2008 8:03 am

Terrazza wrote: Another problem I have with this manifold is that it clogs with grain.


I had trouble with mine getting grain stuck in it when recirculating. So what I do now is just have a copper pipe. When I ham ready to sparge I change to the sparge ring.

Image


Tim
Think Oregon, Drink Oregon
:aaron
Support Your Local Brewer
User avatar
TiMX
 
Posts: 84
Joined: Mon Jun 26, 2006 6:48 am
Location: Pendleton, Oregon

Mon Jun 09, 2008 10:14 pm

Now that looks NICE! I might change over to that design. Me likes it. Does that ring just "plug" in to the copper pipe. It's detachable?
Terrazza
 
Posts: 48
Joined: Tue Dec 27, 2005 5:48 pm

PreviousNext

Return to Brewing Sculptures

Who is online

Users browsing this forum: No registered users

A BIT ABOUT US

The Brewing Network is a multimedia resource for brewers and beer lovers. Since 2005, we have been the leader in craft beer entertainment and information with live beer radio, podcasts, video, events and more.