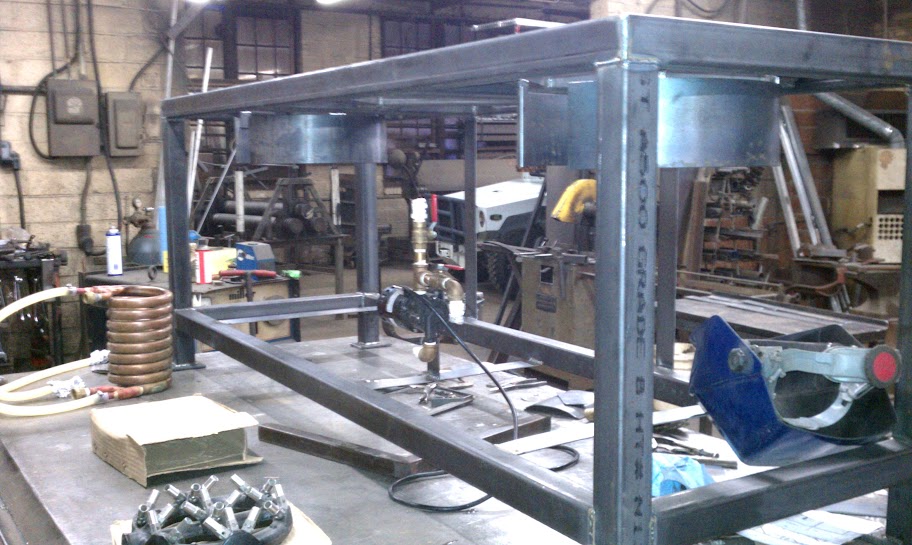
Re: Brew system pics

Fri Feb 10, 2012 6:33 am

canadabrew wrote:
DCBC wrote:
mordantly wrote:DC: looks nice! i spy a coleman XTREME! i use the 72 qt model... is that a 15g corny!?!?


Thanks. Yes, 70 qt Xtreme is my current mash tun. The old one, 52 qt. is next to it and was, for a while, undergoing an electric HLT conversion that I have since abandoned. For luck, both are sporting Celebrator Rams.

Yes, that is a 15 Gallon Corny. That is my fermenter. 1" lopped off the dip tube. Heavy as snot when full. So I put it in the chest freezer, which I roll over to the brew stand so I can pump the wort into it. Then roll it back. After that, all transfers are with CO2.


Hi there - had a question for you how do you aerate in your 15 gallons corney?


I use an aeration/O2 stone on a length of plastic hose hooked up to one of the O2 tanks from Home Depot. Full blast for a minute and some change right before I pitch my yeast.
I've consumed all of my homebrew. I'm worried. I can't relax. Now what?

Pvt. 1st Class BN Army
User avatar
DCBC
 
Posts: 103
Joined: Fri Aug 01, 2008 1:56 pm
Location: Tyler, Texas

Re: Brew system pics

Fri Feb 10, 2012 6:38 am

Matho wrote:
DCBC wrote:Brewing System 3.0 should be finished (at least on the welding end of things) by tomorrow. Dropped my chiller and pump off this morning so he could have a template for the mounts that will be placed on the horizontal cross pieces. Those, the 2" flat vertical bits, and the plumbing extensions are not on yet. You can see the wind screens that will be attached later today.

Getting excited.

Image


My folding stand (see a couple of posts above) is for sale by the way. Someone near north Texas make me an offer. :D


thats one awesome looking workshop I'm so jealous


It is definitely a cool space. But that's not mine. It's a professional welder's shop that I imagine has been in this town forever. The guys that work there have been there for years. Unfortunately, I don't weld. So I spent a good bit of time ebaying things I have, but don't use much to finance this project. The beauty of it is that it takes 5 days start to finish. If it were me, and I could weld, it would cost less in materials, but would probably take me months. The way it sits, they say it should be done by this afternoon.

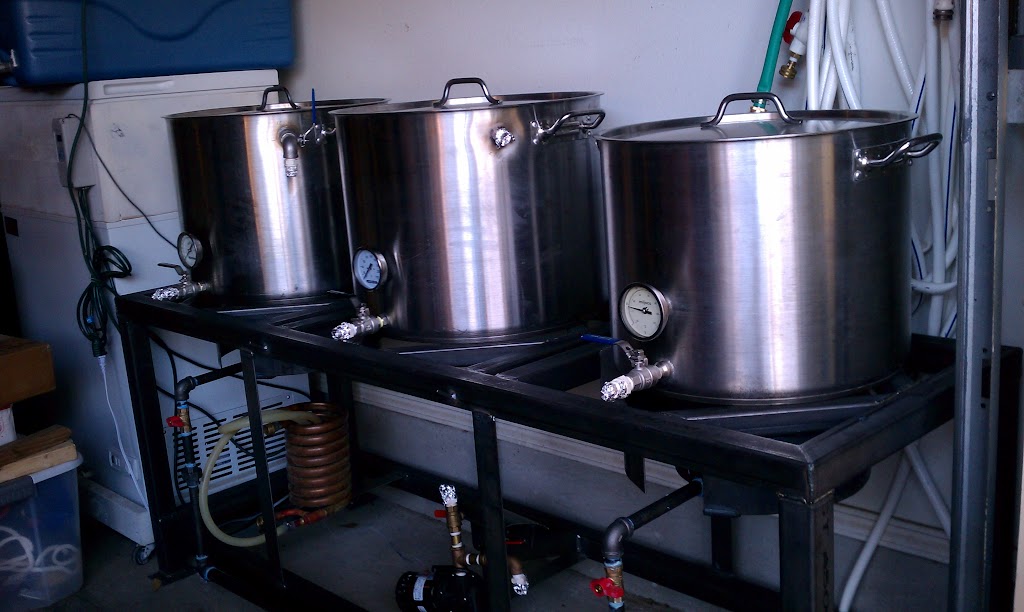
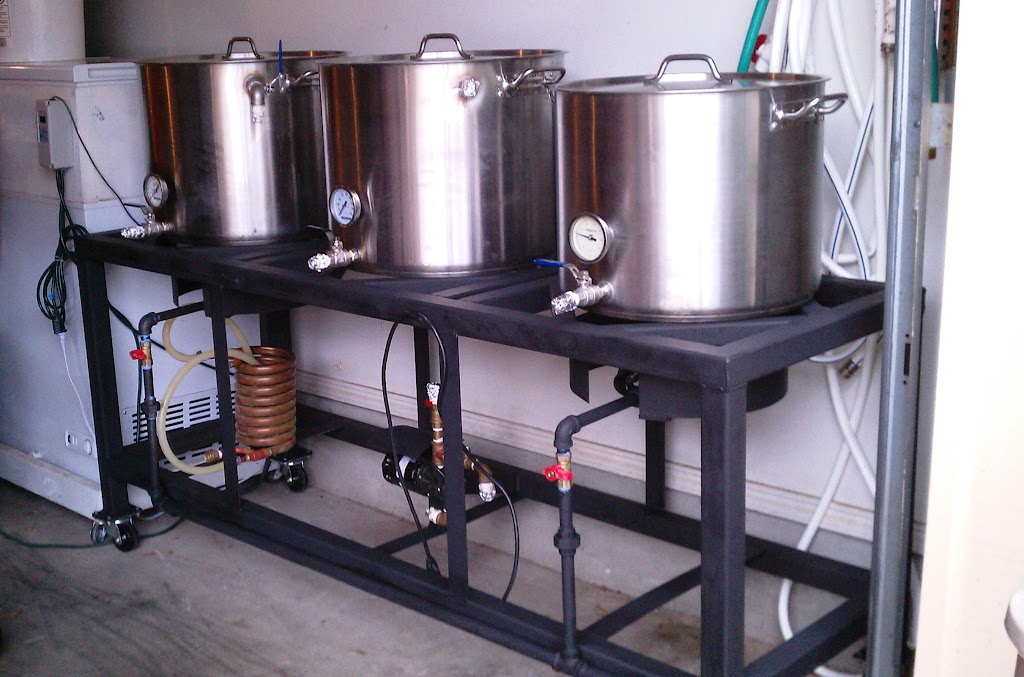
I dropped off the 20 tip jet/wok burners this morning. I had originally planned to just support them with black pipe. But they have a mounting hole on them and are a bit heavier than I expected. So we're having plates done inside the windscreen rings to support them. Then, I can just hang the black gas pipe from them and secure it in a couple of spots on the bottom rail for stability.

Here's this morning's picture. He has the March pump mounted (bolted to a plate) and is working on the cover for it. Next, the mount for the CFC, some vertical pieces in the front to match the rears and some vertical pieces on the top/rear to attach any plumbing assuming I feel industrious in the next year or so and want to hard plumb some return lines or fresh water to the HLT.

Image

I learned a lot from having him do my last stand (and then having him modify it.

1. Be extremely detailed with your drawing and your measurements.

2. While it's there the first time, get everything you think you might want done done. On my last stand, I spent nearly as much having it modified to take a larger kettle as I did to have it built in the first place.

3. Take your gear over and make sure everything fits. It's much easier for them and you to visualize it with the gear in place.

4. When in doubt, build it stout. My original thought was 16 gauge 1.5" box tubing. And while that is probably more than sufficient, in the end, 2" x 0.0125" thick box tubing (except for the diagonal pot supports and cross pieces) was what I went with. Ran about $100 more.

5. The upgrade to stainless is much more expensive than I would have guessed based on what the upcharge at B3 is. They quoted me 3x for SS. Stove paint is much cheaper. :lol:

6. The welding and materials are never as expensive as I expect them to be. But I'll probably owe another $100 for all the add ons I have thrown at them as it came together. This is still cheaper than trying to get it fixed later (see #2 above).

7. Even with all of my planning, I will probably get it home and have forgotten something.
I've consumed all of my homebrew. I'm worried. I can't relax. Now what?

Pvt. 1st Class BN Army
User avatar
DCBC
 
Posts: 103
Joined: Fri Aug 01, 2008 1:56 pm
Location: Tyler, Texas

Re: Brew system pics

Fri Feb 10, 2012 1:32 pm

Awsome build! I'm thinking of going this route this year. I can get SS square channel at a good price from a guy I know that works at a steel supply house. Did they fab the windscreens and thin stock cross supports for you? I'm still in research mode right now.
A woman drove me to drink, and I never had the courtesy to thank her-W.C. Fields
User avatar
scotchpine
 
Posts: 630
Joined: Thu Nov 04, 2010 7:14 am
Location: Rock Hill S.C.

Re: Brew system pics

Fri Feb 10, 2012 10:00 pm

scotchpine wrote:Awsome build! I'm thinking of going this route this year. I can get SS square channel at a good price from a guy I know that works at a steel supply house. Did they fab the windscreens and thin stock cross supports for you? I'm still in research mode right now.


They did it all but the gas plumbing, which I managed to get done by a nearby plumber in about an hour. All of the thin supports are 2" x 1/8" flat steel. The wind screens look like they are at least 1/16" thick. They were apparently robust enough to weld burner supports along the bottom. Will try to get more pictures this weekend. It's home, but still needs stove paint and to have the casters, etc. bolted on. But the hard part is done. Getting it off the truck and into the garage without casters was tough. Must weigh 250 lbs.
I've consumed all of my homebrew. I'm worried. I can't relax. Now what?

Pvt. 1st Class BN Army
User avatar
DCBC
 
Posts: 103
Joined: Fri Aug 01, 2008 1:56 pm
Location: Tyler, Texas

Re: Brew system pics

Sat Feb 11, 2012 12:59 am

@DCBC, I just spent 6 mos. living in Tyler during the weekdays for work. I wish I would have known a member of the :bnarmy: was there. Luckily, I'm working a lot closer to home now, no offense to your city, it's just really fucking far from my swamp.

Your brewery is looking good, I'd love to see it all finished
I need to post updated pics of mine, I guess I'll wait a bit as to not show you up :P
triple-oh_six :bnarmy:

Cajun Brewing
User avatar
triple-oh-six
 
Posts: 1814
Joined: Wed Feb 13, 2008 9:52 pm
Location: Lafayette, La.

Re: Brew system pics

Sat Feb 11, 2012 6:22 am

triple-oh-six wrote:@DCBC, I just spent 6 mos. living in Tyler during the weekdays for work. I wish I would have known a member of the :bnarmy: was there. Luckily, I'm working a lot closer to home now, no offense to your city, it's just really fucking far from my swamp.

Your brewery is looking good, I'd love to see it all finished
I need to post updated pics of mine, I guess I'll wait a bit as to not show you up :P


No offense taken. I'm a transplant from Houston although I suppose I should claim Tyler since I have been here nearly 11 years now. If you're ever back in town, drop me a line.

Right now, I'm in 3 year old's bday party mode with family in town. May have time to work on it tomorrow. Stand is at the house, but needs paint. After that, I'll bolt the casters on and focus on how long I need my hoses to be to work with this system. I've had brass on my pump for a while now and this is as good of time as any to change it. A few more plumbing fittings and I should be ready to inaugurate it with my first attempt at JBA next weekend.

Here it is in its new home.

Image
I've consumed all of my homebrew. I'm worried. I can't relax. Now what?

Pvt. 1st Class BN Army
User avatar
DCBC
 
Posts: 103
Joined: Fri Aug 01, 2008 1:56 pm
Location: Tyler, Texas

Re: Brew system pics

Sat Feb 18, 2012 5:39 pm

This picture isn't much different than the last, but, in it, the brew stand as the first coat of paint and the pump and CFC are mounted. This flat stove paint rubs off though. So I'm waiting on an order of the gloss stuff to do a second coat. I have replumbed the pump in stainless and added the return plumbing for the mashtun. I've also insulated the mash tun. Will do another picture during the inaugural brew tomorrow. Until then.

Image
I've consumed all of my homebrew. I'm worried. I can't relax. Now what?

Pvt. 1st Class BN Army
User avatar
DCBC
 
Posts: 103
Joined: Fri Aug 01, 2008 1:56 pm
Location: Tyler, Texas

Re: Brew system pics

Mon Feb 20, 2012 9:55 am

DC, did you have reservations about using the in frame gas bar design like Lonnie's original. I see that you did'nt go with it.
A woman drove me to drink, and I never had the courtesy to thank her-W.C. Fields
User avatar
scotchpine
 
Posts: 630
Joined: Thu Nov 04, 2010 7:14 am
Location: Rock Hill S.C.

PreviousNext

Return to Brewing Sculptures

Who is online

Users browsing this forum: No registered users

A BIT ABOUT US

The Brewing Network is a multimedia resource for brewers and beer lovers. Since 2005, we have been the leader in craft beer entertainment and information with live beer radio, podcasts, video, events and more.