Re: LP VS Electric Brewery

Mon Jul 21, 2008 8:49 pm

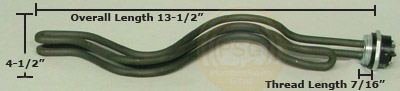
My system is completely electric. It uses a single dedicated 50A circuit fed into a box in my garage which contains a GFI breaker that then feeds the brew stand. In the control box, the circuit is then divided into two circuits, one for the HLT and one for the brew kettle. Each circuit is controlled via a 30A, 250V, DPST switch, so that when I am done with one particular vessel, I can shut it off. The HLT is controlled with a single Love temperature controller using an AC triggered SSR. I plug in the temperature I want the water to reach, and the controller switches the HLT on/off as needed. The brew kettle is powered by a Payne controller, similar to this, which is essentially a solid state power triac, which then feeds into another AC triggered SSR, and then into the brew kettle. (This extra SSR is a little redundant, but it allowed me to make a simple on/off toggle switch that switches off the power to the AC trigger of the SSR to shut off the brew kettle without reaching to the side of the control box and flipping the heavy duty switch). The HLT contains a regular 4500W high density element, and the brew kettle contains a 4500W extra low density element, similar to this one. The kettles are two converted kegs, the elements attach to the kegs with one-inch couplers that were welded into the kegs. For the electrical connections on the outside of the kegs, I JB welded electrical boxes with small circles cut into them over the couplers, screwed a box cover to the box with a small square cut out, and wired in an appropriately rated three-prong male receptacle (from mouser.com, on this page if I remember correctly). This ensures that if the kettle were somehow unplugged during the brew session, no wires or terminals would be exposed for a person to accidentally touch. (And conversely, on the control box, the plugs are the opposite, with female receptacles on the control box and male plugs on the cords) On the bottom of the kegs, I screwed in some copper grounding screw terminals to ensure a good ground connection at all times.

I'll try to take some pictures tomorrow if I can remember, but my stand isn't nearly as good looking as baltobrewer's... mine is very much still in a 'beta' state... my pump isn't yet wired into my control box, and my control box itself is just made out of wood for this first version, I plan on eventually replacing it with a proper NEMA enclosure. I was also going to do something similar to baltobrewer with regards to using a plate chiller as a heat exchanger, but I am a little disappointed by his reports that he is unable to step mash with it... so I may reconsider going that route after all... that being said, I've brewed somewhere near 30-35 batches on this since December and I am very happy with how it is working out thus far.

P.S. - It should go without saying that if you aren't familiar with electricity, and any of the above doesn't make sense to you, you probably should not attempt this project. Electricity at this level of current is very dangerous.
User avatar
Anthony
 
Posts: 57
Joined: Sun Jan 21, 2007 12:39 pm

Re: LP VS Electric Brewery

Tue Jul 22, 2008 4:31 am

Anthony

Thanks for the detailed layout. I am really looking forward to getting things going here. Just working out what size batch to settle on. I would like to go for 20 Gallons, but there are obvious challenges with heating and transfering. OK there are not really chalenges, just expensive Kettles.

With the 4500 Ultra low density element, how long does it take to reach a boil? How long does the HLT take to reach strike temp? I am toying with the idea of running a second subpanel to the brewery and having dual heating elements in each vessel. Something I may have to do if I go 20 Gallons.
Prost!

Christian

__________________________________________________________________
Teach a friend(s) to brew. Give away your recipes. Bring beer to the masses.
User avatar
Hammer
 
Posts: 131
Joined: Fri Jul 11, 2008 8:31 am
Location: NY

Re: LP VS Electric Brewery

Tue Jul 22, 2008 6:06 am

Hammer wrote:Anthony

Thanks for the detailed layout. I am really looking forward to getting things going here. Just working out what size batch to settle on. I would like to go for 20 Gallons, but there are obvious challenges with heating and transfering. OK there are not really chalenges, just expensive Kettles.

With the 4500 Ultra low density element, how long does it take to reach a boil? How long does the HLT take to reach strike temp? I am toying with the idea of running a second subpanel to the brewery and having dual heating elements in each vessel. Something I may have to do if I go 20 Gallons.


I built my system for a 12 gallon batch, but I still, more often than not, am brewing a 6 gallon batch. It usually takes 20-30 minutes to reach boiling because as I alluded to in another post, you're only increasing the temperature from the mash temp to boiling, so it isn't really a huge jump. It can go faster if I fire up the kettle after the first runnings have covered up the element. I always fill the HLT to the top of my sight glass (13 gallons), and it usually takes about 45 minutes to get to strike temperature... but that isn't too big of a deal because I use that time to crush grain or have some coffee or whatever since that is all automated. One thing that you have to be careful of in the HLT, no matter where you place your probe, you will get temperature striation. Some people have implemented stirring motors to get around this... at first, I did that, but eventually I decided the motor was too loud and too much of a hassle. So now when my HLT gets to temperature, I give it a good stir, that takes it down 6 or 7 degrees, and when it gets back to temperature again, all of the water is actually at the correct temperature.

You should think a bit about the 20 gallon vs 10 gallon thing. When you're doing a LP or NG system, it really isn't that much of a difference besides the vessel size... but when you're doing an electric system, the cost is essentially multiplied because the higher current drives up the cost of everything from wiring to switches to terminals.
User avatar
Anthony
 
Posts: 57
Joined: Sun Jan 21, 2007 12:39 pm

Re: LP VS Electric Brewery

Thu Jul 24, 2008 6:28 pm

Here are some relevant pics from my setup, like I said, this is very much a version 1.0. Version 2.0 will be an improved (sexy) control box, integrating the pump control, and possibly HERMS.

Image

Image

Image

Image

Image

Image

Image

The welds on my HLT weren't as clean as they could be, so occasionally I get a little bit of rust build up in there, I scrub it with BKF when it gets bad enough.

Image
User avatar
Anthony
 
Posts: 57
Joined: Sun Jan 21, 2007 12:39 pm

Re: LP VS Electric Brewery

Fri Jul 25, 2008 7:39 am

Looks good. My system is looking better each day. I will have to post some pics this weekend. Last night I finished the Mash Tun. Next up is to modify the HLT to Electric. It is tricky because I am trying to do all this while still brewing on it. I am almost out of beer! 2.5 Kegs and 1 case is all I have. Oh plus the 15 gallons fermenting. either way I will try to get picks up for feedback.
Prost!

Christian

__________________________________________________________________
Teach a friend(s) to brew. Give away your recipes. Bring beer to the masses.
User avatar
Hammer
 
Posts: 131
Joined: Fri Jul 11, 2008 8:31 am
Location: NY

Re: LP VS Electric Brewery

Fri Jul 25, 2008 12:08 pm

Anthony, the thermowell on the kettle loks a bit close to the element. Does it throw off the control?

Mad props for the BN Army sticker, BTW...
Jay
___

Lime cat thinks you suck
___

ON TAP:
RIS
Hefe
Pumpkin Ale
English Brown
American Blonde
O'fest
APA
Alt
Schwarzbier
Dry Stout

FERMENTING:
Nugget Nectar Clone
User avatar
baltobrewer
 
Posts: 655
Joined: Fri Apr 28, 2006 5:15 pm
Location: York, PA

Re: LP VS Electric Brewery

Mon Jul 28, 2008 7:15 pm

baltobrewer wrote:Anthony, the thermowell on the kettle loks a bit close to the element. Does it throw off the control?

Mad props for the BN Army sticker, BTW...


I think maybe the picture from above makes it look like that... however, in retrospect, I would put the thermowell closer to the output of the HLT. It striates in any event, so I usually have to give it a stir before I actually dough in or sparge. Originally I had wired up a stir motor for the HLT to prevent striation, but in the end, I decided it was easier to just stir once then to listen to the motor running, and deal with it.
User avatar
Anthony
 
Posts: 57
Joined: Sun Jan 21, 2007 12:39 pm

Re: LP VS Electric Brewery

Mon Jul 28, 2008 9:00 pm

Anthony wrote:Originally I had wired up a stir motor for the HLT to prevent striation, but in the end, I decided it was easier to just stir once then to listen to the motor running, and deal with it.
I was going to plug my stir motor into the same outlet as my HLT heating element, both controlled by a single PID. That way it would only run when heating was needed. Does this make sense, and wouldn't this work? -Eric
Aging: Gotlandsdrickå, Baltic Porter in Bourbon barrel, Olde Ale #2 in whiskey barrel
On Draft: Nothing. Building a walk-in cooler right now.
User avatar
foomench
 
Posts: 751
Joined: Fri Jun 27, 2008 7:53 pm
Location: Longmont, CO

Previous

Return to Brewing Equipment

Who is online

Users browsing this forum: No registered users

A BIT ABOUT US

The Brewing Network is a multimedia resource for brewers and beer lovers. Since 2005, we have been the leader in craft beer entertainment and information with live beer radio, podcasts, video, events and more.